
How to Set Up a Shopify Store Step-by-Step
Is your online store reaching its full potential?
Businesses frequently encounter challenges in scaling their operations, managing customer data, and adapting to rapidly changing market demands. Shopify, a leading e-commerce platform, has demonstrated resilience and growth despite economic uncertainties.
In the first quarter, Shopify reported revenue of $2.36 billion, surpassing analyst expectations of $2.33 billion. This performance highlights the platform's ability to attract and retain merchants, even in a fluctuating market.
Furthermore, Shopify's integration of AI-powered tools, such as the "Shopify Magic" suite, has been instrumental in enhancing merchant capabilities. These tools help automate tasks such as sales reporting and customer behavior analysis, enabling businesses to operate more efficiently.
This blog will guide you through the essential steps to set up and optimize your Shopify store, ensuring it is well-equipped to meet the demands of today's digital marketplace.
Why Shopify is the Ideal Platform for Your Online Store?

When considering an e-commerce platform for your business, Shopify stands out as a top choice due to its robust features, ease of use, and ability to support businesses at any stage of growth. Here’s why Shopify is trusted by entrepreneurs and established brands alike:
- Effortless Setup & User-Friendly Interface: Shopify’s intuitive dashboard makes it easy for beginners to manage their store, from adding products to tracking inventory and processing orders. The adoption of AI-powered tools has helped drive its popularity, with a 26% revenue increase in the third quarter of 2024.
- Customizable Themes: Shopify offers a wide range of highly customizable themes, allowing you to create a store that reflects your brand’s style without requiring coding skills.
- Comprehensive Payment Solutions: Shopify integrates with multiple payment gateways, offering secure transactions, currency conversion, and fraud prevention for a seamless customer experience.
- Scalability: Shopify grows with your business, offering flexible pricing plans and tools for managing product additions, international sales, and analytics.
Now that you have a strong understanding of Shopify’s core features, let’s move on to the actual setup process to get your store live and running.
Read: Diagnose and Improve Shopify Website Performance
Steps to Set Up Your Shopify Store

Setting up your Shopify store is a straightforward process, but it’s important to approach each step with care to ensure everything is in place for a seamless launch. Whether you’re new to e-commerce or already familiar with the basics, following these steps will help you create a robust online store that’s optimized for both user experience and business success.
Let’s break down each stage to make sure you’re prepared to launch with confidence.
Step 1: Create Your Shopify Account
The first step is to create your Shopify account and set up your store on the platform. Here’s how to start:
1. Go to Shopify’s Website: Visit Shopify’s homepage and click on the "Start Free Trial" button to get started. This trial allows you to explore the platform without making an immediate commitment.
2. Sign Up and Customize: After entering your email, password, and store name, Shopify will guide you through the process of creating your store. It’s essential to choose a store name that resonates with your target audience and aligns with your branding.
3. Enter Your Business Details: Please provide the necessary business details, including your name, address, and phone number. This is crucial for accurate billing, shipping, and tax configurations in the future.
Tip: Take your time to think about the store name, as it will be part of your domain name and will play a critical role in your branding and SEO strategy.
Step 2: Set Up Your Store’s General Settings
Once your account is created, you’ll need to configure general store settings to ensure everything works smoothly:
1. Access the Settings: From your Shopify dashboard, navigate to "Settings" in the bottom-left corner. This is where you can input vital business information, such as your store name, tax details, and shipping information.
2. Configure Store Details: Input your legal business name, contact information, and any necessary tax settings for your location.
3. Set Currency and Time Zone: Select the correct currency for transactions and your preferred time zone to ensure accurate order processing and reporting.
While it’s easy to adjust currency settings later, setting the correct one from the beginning can help streamline transactions and avoid confusion for international customers.
Step 3: Select the Right Shopify Plan
Choosing the right Shopify plan is crucial for aligning the platform’s features with your business needs. Shopify offers several pricing plans:
1. Basic Shopify: Ideal for new businesses or small-scale operations that need the essentials to get started.
2. Shopify Plan: Designed for businesses looking to scale with advanced features like reporting tools and more support options.
3. Advanced Shopify: Ideal for established businesses that require robust analytics, advanced reporting, and more comprehensive inventory management.
4. Shopify Plus: A premium plan offering enterprise-level features and customization for large businesses.
You can start with a 14-day free trial to test Shopify’s features and see how well they meet your needs before committing to a paid plan.
Step 4: Choose and Customize Your Theme
Your store's design plays a key role in making a lasting first impression. Shopify offers a range of free and paid themes to ensure your store not only looks great but functions seamlessly across devices.
1. Browse and Preview Themes: Navigate to the "Online Store" section in the admin panel, where you can explore a range of themes in the "Themes" tab. Take your time to preview several options before settling on the one that best represents your brand.
2. Install and Customize: Once you’ve chosen a theme, click "Add to Theme Library" and then begin customizing it. Shopify’s drag-and-drop editor makes it easy to modify the layout, colors, fonts, and other visual elements to align with your branding.
Tip: Don’t rush the customization process; ensure your theme reflects the personality of your brand. A well-designed site not only boosts trust with visitors but also enhances the overall shopping experience.
Step 5: Add Products to Your Shopify Store
Now that your theme is in place, it’s time to showcase your products. Adding products is straightforward but requires attention to detail:
1. Access the Product Section: From your Shopify dashboard, navigate to "Products" and click "Add Product."
2. Add Product Information: Enter a detailed product title, an engaging description, and the price. Be sure to highlight key features and benefits in the description to improve both user experience and SEO.
3. Upload High-Quality Images: Upload clear, high-resolution product images that highlight various angles or features of your products. Include multiple images to give customers a comprehensive view of what they’re purchasing.
4. Set Inventory and Shipping Options: Specify the quantity of each product, and, if applicable, enter the product's weight and dimensions for accurate shipping calculations.
Tip: High-quality, professional product photos can make a significant difference in converting visitors into buyers. The more detailed your product listings are, the more confident customers will feel about their purchase.
Step 6: Set Up Payment Gateways
To begin accepting payments, you’ll need to configure payment gateways. Shopify supports a wide variety of options:
1. Shopify Payments: Shopify Payments is the most straightforward choice for processing payments, allowing you to accept credit card payments, Apple Pay, and Google Pay with minimal setup.
2. Third-Party Payment Gateways: If Shopify Payments isn’t available in your region or you prefer alternative options, Shopify integrates with PayPal, Stripe, and numerous other payment gateways. You can activate additional gateways in the "Payments" section of your settings.
Shopify Payments is recommended for its low transaction fees. It’s often the easiest and most cost-effective solution for most store owners.
Step 7: Configure Shipping Settings
Setting up your shipping rules is crucial to ensure that customers receive their orders promptly and efficiently. Here’s how to do it:
1. Shipping Zones and Rates: In the "Shipping and Delivery" section of the settings, you can define shipping zones, such as domestic or international, to determine the applicable shipping rates. You can set shipping rates based on weight, price, or location.
2. Carrier Integration: Shopify seamlessly integrates with major shipping carriers, including UPS, FedEx, and USPS. Set up real-time shipping rates to ensure customers can track their shipments accurately.
3. Free Shipping Options: If applicable, offer free shipping to increase conversion rates. Shopify allows you to set up conditions such as free shipping on orders over a specific amount.
If you're offering free shipping, ensure that you account for this cost in your pricing or promotional strategy.
Step 8: Set Up Tax Settings
Shopify simplifies tax calculations, but it's essential to review and adjust settings, especially for multiple regions. Here’s a concise breakdown of how to set up taxes:
1. Automatic Tax Calculation: Shopify automatically applies sales tax based on your store's location and the customer's shipping address, adjusting rates accordingly at checkout.
2. Tax Exemptions: You can mark tax-exempt customers (e.g., government or educational institutions) to ensure taxes aren’t added to their purchases.
3. Digital Products & Services: Review settings for digital goods (such as software or e-books), as different regions may apply varying tax rates.
4. Product-Specific Tax Rates: Shopify allows customization of tax rates based on product type (e.g., food, clothing, or medical supplies).
International Sales:
- Set tax rates for countries where you sell, and Shopify will apply them based on the shipping address.
- VAT: If selling in the EU, Shopify calculates VAT based on local regulations.
- Sales Tax in Canada and Australia: Shopify lets you set GST/HST rates for each region.
- Tax Nexus: In the U.S., define your tax nexus to ensure tax is collected in the relevant states.
Additional Settings:
- Shopify handles currency conversions for international sales and enables tax-inclusive pricing in select regions, such as the EU. Custom tax rules can be applied for specific regions or countries.
- Tax laws are subject to change, especially for international sales. It's essential to stay informed about local tax regulations and ensure that your tax settings in Shopify are regularly updated to maintain compliance.
Step 9: Review and Test Your Store Before Launch
Before you launch your store, it’s essential to test its functionality to ensure everything works as expected. Here's what to check:
1. Test the Checkout Process: Place a test order to verify that the checkout flow is smooth and accurate.
2. Check Mobile Compatibility: Ensure that your store is fully responsive on mobile devices. A significant portion of shoppers use smartphones to make purchases, so your store needs to perform flawlessly across all screen sizes.
3. SEO and Content Review: Double-check that your product descriptions, page titles, and meta descriptions are optimized for search engine optimization (SEO). This will help attract organic search engine traffic.
Tip: Run multiple tests to catch any errors before going live. A smooth, error-free experience for customers is key to a successful launch.
With your store ready, let’s discuss some additional tips to ensure its long-term success.
Read: Differences Between Click vs View Conversions
Additional Tips for Shopify Success

While setting up your Shopify store with the proper foundation is crucial, ongoing optimization and strategic adjustments are what lead to sustained success. Here are a few additional tips that will set your Shopify store up for long-term success.
1. Optimize Your Store’s User Experience
Your store’s user experience (UX) is the backbone of customer retention. A seamless experience across all platforms is essential for ensuring that visitors not only stay longer but also convert into loyal customers. Here’s how you can improve the overall UX:
- Mobile Optimization: With mobile shopping on the rise, it's crucial to make your store mobile-responsive. While Shopify themes are mobile-friendly, testing performance across devices is essential. A seamless mobile experience allows buyers to navigate and check out quickly..
- Simple Navigation: Ensure your site is intuitive and easy to navigate. Utilize clear categories and product filters to assist customers in finding what they need. An efficient search bar and logical layout enhance the shopping experience, especially for larger sites..
- Fast Loading Speed: Fast load times are crucial for enhancing customer engagement and reducing bounce rates, particularly in e-commerce. Slow websites frustrate users and can negatively impact sales. Optimize images, minimize scripts, and select a suitable hosting plan for your traffic levels.
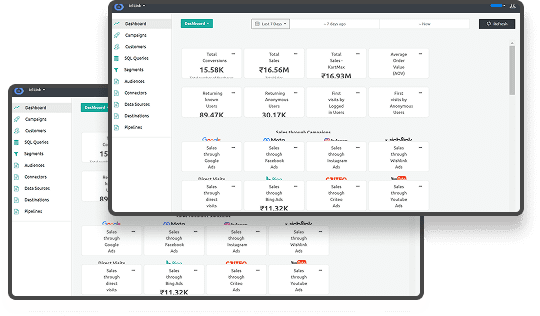
By investing time in improving UX, you ensure a positive, frictionless experience for your visitors. Ingest IQ, with its powerful tracking tools, offers real-time insights into user interactions, enabling you to pinpoint exactly where customers are dropping off or experiencing friction, so you can address these issues and optimize their journey.
2. Monitor Store Performance
Understanding how your store performs is essential to making data-driven decisions that will help you grow your business. Shopify’s built-in analytics provides basic insights, but to get deeper, actionable insights, you need to track and analyze the right metrics:
- Traffic Sources: Understanding your traffic sources enables you to allocate marketing efforts and budgets more efficiently. By understanding whether traffic comes from organic search, paid ads, or social media, you can optimize and strategically grow your strategy..
- Sales Metrics: Monitoring sales metrics, such as revenue, average order value, and best-selling products, helps identify trends and evaluate the effectiveness of your pricing strategy. Focus marketing efforts on promoting top performers.
- Customer Insights: Understanding your customer base is crucial for tailoring your offerings effectively. Shopify provides detailed customer behavior data, but combining this with tools like Event IQ from Ingest Labs can allow you to track campaigns across devices and unify your data streams.
By continually monitoring your store’s performance, you ensure that your store evolves with your customers' needs. Ingest Labs offers advanced analytics tools, such as Ingest IQ and Event IQ, to provide you with in-depth customer insights that can drive future decisions for your store’s growth, from optimizing sales channels to improving customer targeting strategies.
3. Build Strong Relationships with Your Customers
It’s not just about making a sale; it’s about turning first-time customers into repeat buyers. Establishing and maintaining strong relationships with your customers is key to long-term success. Here are some ways to foster customer loyalty:
- Quick and Effective Customer Service: Quality customer service fosters trust and satisfaction. Customers prefer quick issue resolution via email, live chat, or phone. Investing in communication tools and staff training ensures excellent service, keeping customers engaged and satisfied.
- Personalized Offers: Use customer behavior data from your website to create personalized offers. Tailor email campaigns, product recommendations, and promotions based on previous behaviors and preferences to ensure customers feel valued.
- Engagement Beyond the Sale: Foster Loyalty by Engaging Customers After the Purchase. Email follow-ups, personalized birthday discounts, and surveys help them feel part of your brand community.
Building long-term relationships fosters a loyal customer base that trusts your brand. Ingest ID, utilizing first-party data, enables personalized experiences by tracking customer behavior across touchpoints. This allows precise marketing efforts, thereby enhancing engagement and conversion.
Read: Comprehensive Guide to Shopify Markets Features
By applying these tips, you’ll enhance the user experience on your Shopify store, foster stronger customer relationships, and monitor performance in real-time.
Final Thoughts
Building and optimizing a successful Shopify store requires more than just setting it up and launching. By continuously improving user experience, monitoring store performance, and nurturing strong customer relationships, you can ensure that your business thrives in the competitive e-commerce landscape. Applying these strategies will not only enhance your store's functionality but will also help you create a loyal customer base that drives sustainable growth.
At Ingest Labs, we empower businesses by providing advanced solutions for tracking, personalization, and data compliance, enabling you to optimize every customer touchpoint. With Ingest IQ, Ingest ID, and Event IQ, you can take your Shopify store to the next level, maximizing conversions while maintaining data privacy.
Start your journey with Ingest Labs and unlock your Shopify store's potential with data-driven insights. Contact us today!