Set Up Shopify Meta Conversions API: A Complete Guide
Are you confident that your advertising dollars are being spent wisely?
In the U.S., over 4.6 million Shopify stores are operating, making the e-commerce space more competitive than ever. With such saturation, ensuring that every marketing dollar is effectively spent is of the utmost importance. However, traditional tracking methods often fall short. A significant portion of online purchases go untracked due to limitations in browser-based tracking.
This data gap can lead to misinformed decisions, which can negatively impact your return on investment. To address this, the Meta Conversions API (CAPI) offers a solution by sending event data directly from your server to Meta, bypassing browser restrictions. By implementing Shopify CAPI, businesses have reported improvements in ad performance and more accurate attribution.
TL;DR
- Shopify CAPI improves ad tracking by sending data directly from your store to Meta, bypassing browser restrictions.
- Benefits: Provides accurate conversion tracking, better attribution, and optimized ad performance even with ad blockers.
- Setup Steps: Install the Facebook app, generate a Meta access token, enable maximum data sharing, and consider advanced setups for customization.
- Best Practices: Monitor data quality, use custom events, ensure privacy compliance, and resolve issues like event duplication and poor match quality.
What Is Shopify CAPI and Why Does It Matter?
The Meta Conversions API (CAPI) is a server-side tool that allows businesses to send website events like purchases and sign-ups directly from their server to Meta. Shopify CAPI refers to the implementation of this API within your Shopify store.
Unlike the standard Facebook Pixel, which collects data from a user's browser, Shopify CAPI ensures that data is collected even if a user has browser tracking disabled. The result? Improved data accuracy, more complete attribution, and stronger ad performance.
To better understand why this is important, let’s take a closer look at how Shopify CAPI compares to the Pixel and why it offers more reliable tracking.
Why It's Better Than Pixel Alone
While the Meta Pixel captures data from a user’s browser, Shopify CAPI sends the same (or more) data to the server. Dual-path tracking significantly improves event match rates, especially for actions like purchases, checkouts, or form submissions. Browser privacy restrictions, like Safari’s ITP and Firefox’s ETP, cause severe data loss with browser-only tracking.
Shopify CAPI bridges this gap by transmitting signals directly from Shopify’s backend to Meta’s servers, ensuring continuity even when browser tracking fails. It also enables businesses to gain insight into post-purchase behaviors that aren't visible through Pixel tracking alone.
Real-World Benefits include:
- More accurate attribution for Facebook ads
- Higher event match quality and better optimization
- Reliable data, even when browser tracking is blocked
- Stronger insights for retargeting and lookalike audiences
As we proceed, let’s review the requirements before you can start setting up Shopify CAPI.
Shopify CAPI Setup Requirements
Before starting the setup, ensure that your Shopify store and Meta assets meet the required conditions. From having the right Shopify plan to proper access inside Meta Business Manager, here are the essentials to have in place:
What do You Need?
- A Shopify plan: Basic or higher is required.
- Facebook Business Manager: With full admin access.
- Meta Pixel ID: You’ll connect this via the Events Manager.
- Events Manager Access: This allows you to configure the token and validate the event flow.
- Optional: A GDPR/CCPA-compliant consent banner solution, mainly if you operate in regulated markets like the EU or California.
Native vs Server-Side vs Third-Party
When setting up Meta CAPI, there are three integration paths to choose from, depending on your specific needs. Each approach offers different levels of control, ease, and customization for tracking events.
- Native Shopify integration: Recommended for most users. Easy, fast, and no-code.
- Manual/Advanced setups: Required for deeper control, custom events, or privacy customization.
Let’s now walk through a straightforward, step-by-step guide for setting up Meta CAPI on Shopify, starting with the simplest method.
Also Read: Diagnose and Improve Shopify Website Performance
How to Set Up Meta CAPI on Shopify: A Step-by-Step Guide
As your Shopify store experiences growth and advertising costs increase, the opportunity to identify and rectify tracking inefficiencies diminishes. Meta CAPI implementation isn’t just about resolving attribution issues. It aims to create a sophisticated, privacy-compliant data pipeline. It adapts to evolving platform regulations, signal loss, and compliance requirements.
Here’s how to implement it through Shopify’s native app, along with advanced methods for when precision and flexibility are most important.
Step 1: Install the Facebook & Instagram App
To begin, connect Shopify with Meta’s ecosystem using the official app:
- Visit the Shopify App Store and search for Facebook & Instagram by Meta.
- Click Install App and approve the necessary permissions in Shopify.
- Log into your Facebook Business Manager account when prompted.
- Link the following components:
- Your Facebook Business Page
- Your Facebook Ad Account
- Your Meta Pixel (new or existing)
- Allow all requested permissions during setup to ensure full data access.
- Complete the channel connection by following Shopify’s step-by-step flow until the app is fully integrated.
Once the setup is complete, Shopify and Meta will automatically sync products and pixel settings.
Step 2: Generate Your Meta Access Token
The access token connects your Shopify store to Meta’s server infrastructure:
- Go to Meta Events Manager.
- Select the Pixel you connected in the previous step.
- Click on the Settings tab (right side of the top menu).
- Scroll to the Conversions API section and locate the token option.
- Click Generate Access Token, then copy and save it securely.
- Paste the token into a secure location (e.g., password manager or secure notes) for later reference.
Important: Never revoke a token unless you're replacing it. Revoking breaks the data stream, causing server events to stop flowing.
Step 3: Turn On Maximum Data Sharing in Shopify
This step enables both Pixel (browser) and Shopify CAPI (server-side) tracking simultaneously:
- Open the Facebook & Instagram apps inside your Shopify admin.
- Go to the Settings section, then click on Data Sharing Settings.
- Choose the Maximum data sharing option.
What this does:
- Enables server-side event tracking through Meta CAPI
- Automatically ensures event deduplication using shared event IDs
- Improves your Event Match Quality score in Meta Ads Manager
- Provides fallback tracking if browser signals are lost (due to ITP, ETP, ad blockers, or private browsing)
To verify, head to Events Manager → Pixel → Settings and check if Conversions API is marked as Active.
Step 4: (Optional) Manual / Server-Side Setup for Power Users
For brands running high-budget campaigns or needing advanced tracking flexibility, adding server-side tagging via a robust plugin can elevate your implementation:
You have two solid paths:
- DIY with GTM or Stape.io
- Use Google Tag Manager server container or standalone solutions to build custom event triggers.
- Requires managing server infrastructure, custom event logic, and consent handling.
- Use Ingest Labs’ Server‑Side Tagging Plugin
- The Ingest Labs Tag Manager plugs directly into Shopify to deploy server-initiated events through your custom setup.
- It helps send events, such as BeginCheckout, AddPaymentInfo, and Purchase, server-side, and routes them through Ingest Labs’ infrastructure
- Your data remains on first-party domains, enabling better signal fidelity, data governance, and GDPR/CCPA readiness with minimal technical overhead.
When to choose this approach:
- If your business needs privacy-triggered server events, such as GDPR-compliant flows.
- When you want complete control over which parameters or custom tags are fired without relying entirely on Pixel or client scripts.
- If you’re ready for a slightly more advanced setup but prefer a guided, Shopify-friendly experience.
Tip: Manual setups offer unmatched control but require advanced technical knowledge and server infrastructure.
Ingest IQ helps Shopify brands implement high-performance tracking across all devices while maintaining a privacy-first approach.
With your setup in place, let's review how to test and validate that your Shopify CAPI implementation is functioning as expected.
Also read: Understanding the Significance and Role of Data Integrity
Testing and Validating Your Shopify CAPI Setup
Once Shopify CAPI is enabled, you need to confirm it's working as expected using Meta’s diagnostic tools and browser extension. Proper testing ensures your event data is syncing correctly from both the browser and server sides.
Use Meta’s Test Events Tool
Meta's Test Events Tool allows you to simulate user activity and view real-time event tracking.
- Open Meta Events Manager > Your Pixel > Test Events tab.
- In a new browser window, open your Shopify store.
- Trigger actions such as viewing a product, adding to the cart, and checking out.
- Confirm that those events appear in real time under the Test Events panel.
Use Facebook Pixel Helper (Chrome Extension)
The Facebook Pixel Helper extension is useful for seeing which events are being tracked.
- Install the Facebook Pixel Helper extension.
- Visit your store and browse typical pages.
- The helper should show both browser events and server-side events.
- Look for deduplicated events with shared Event IDs to verify proper syncing.
Match Event IDs for Deduplication
Meta requires the same Event ID to appear in both browser and server events to avoid double-counting.
- Ensure both browser and server events include a matching Event ID.
- Shopify does this automatically if you’ve enabled Maximum data sharing in the Facebook app integration.
Testing ensures that your data is transmitted seamlessly from both sides. With the setup complete, let’s look at some advanced tips for tailoring your Shopify CAPI to meet your business needs.
Advanced Shopify CAPI Tips: Custom Events + GDPR Readiness
If you're managing high-volume campaigns or working in privacy-sensitive markets, it's essential to tailor your data collection and event strategy. These tips focus on extending Shopify CAPI to meet both optimization and compliance needs.
Set Up Custom Events
Standard tracking only gets you so far. To go deeper, configure Shopify or a server-side tool to send non-standard events such as:
- add_to_cart
- initiate_checkout
- subscription_start
- lead_submission
You can include extra parameters such as product category, customer type, pricing tier, or subscription plan. This added context provides Meta's algorithm with more information to work with, resulting in sharper audience targeting, improved conversions, and more efficient ad delivery.
Hashing & Privacy Compliance
To align with global data privacy laws like GDPR and CCPA:
- Hash Personal Data: All customer identifiers, such as email or phone number. Should be hashed using SHA-256 before being transmitted to Meta.
- Respect Consent: Utilize a consent management platform (CMP) to monitor user permissions before sending any data, and only fire Shopify CAPI events after opt-in.
- Document Transparency: Update your Privacy Policy to clearly outline your data-sharing practices, including the use of Shopify CAPI.
- With Ingest Labs, you can seamlessly integrate with any Consent Manager to control Shopify CAPI event firing based on user consent. The pr_comp data element dynamically evaluates browser-level permissions (True/False) and ensures media tags only trigger when compliant.
Now that you’re aware of the advanced strategies, let’s discuss some troubleshooting tips for addressing common issues with Shopify CAPI integration.
Troubleshooting Common Shopify CAPI Issues
Even with proper configuration, Facebook’s Conversions API (CAPI) integration with Shopify can sometimes encounter issues. Here’s how to identify and resolve the most common problems affecting your data tracking and event performance.
1 Events Not Showing in Events Manager
If no server-side events appear in your Facebook Events Manager, the issue is often with authentication, domain verification, or app permissions.
- Check the Access Token: Ensure the access token used for Shopify CAPI is valid and has not expired. A missing or invalid token will block all event transmissions.
- Review Pixel/App Permissions: Verify that your Facebook Pixel is correctly connected to the right Shopify store and has the necessary permissions.
- Confirm Domain Connection: Your domain must be verified inside Facebook Business Manager. Unverified domains can prevent events from being accepted.
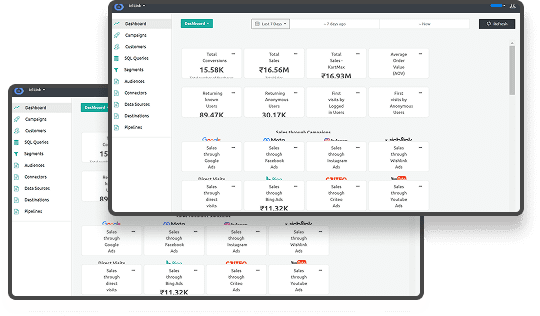
- Tip: Use the Connectors screen in Ingest Labs’ Media Data Platform to verify the connection between Shopify and Meta CAPI
2 Duplicate Events
When the same event is received multiple times, it often signals deduplication issues between browser and server events.
- Check Event IDs: Shopify relies on event IDs to deduplicate browser and server events. Missing or mismatched IDs can trigger duplicates.
- Enable Shopify's Native Deduplication: Ensure that Shopify's Maximum Data Sharing setting is enabled. It includes built-in deduplication logic.
3 Red Triangles in Events Manager
A red triangle icon in the Events Manager typically means the server-side event failed to deliver or was rejected.
- Retry with Test Events Tool: Use Facebook’s Test Events tool to resend events and confirm the payload is reaching the server.
- Recheck Access Token: A rejected event may indicate that the token is malformed or expired; generate a new one if needed.
- Inspect Network Configuration: Ensure that no firewall, VPN, or browser extension is blocking outbound connections to Facebook’s servers.
4 Poor Match Quality
Low event match quality means Facebook can’t accurately attribute conversions due to missing or poor-quality customer data.
- Validate Data Hashing: Ensure that all user identifiers, such as email addresses and phone numbers, are hashed using SHA-256 before transmission.
- Capture More Identifiers: Add as many attributes as possible (email, phone, zip code, external ID) to boost match rates.
- Check for Pixel Conflicts: Multiple pixels installed on the same page can interfere with accurate matching and attribution. Audit your theme and apps for redundant pixel scripts.
With these insights, you can keep your Shopify CAPI setup running smoothly. Lastly, let’s look at some best practices for maximizing the value of your Shopify CAPI implementation.
Optimization Best Practices for Shopify CAPI
Setting up the Conversions API (CAPI) is only the beginning. To maximize the value of your data, continuous monitoring and strategic enhancements are crucial. These best practices help ensure your Meta ads stay efficient, privacy-compliant, and conversion-driven.
- Check Events Manager weekly to monitor Event Match Quality and catch issues early.
- Use UTM parameters on Facebook ads to track conversions in GA4 or CDPs.
- Implement a Consent Management Platform (CMP) to ensure compliance with GDPR and CCPA regulations.
- Audit consent flows are regularly reviewed to ensure that only users who have opted in are tracked.
- Rotate your Meta access token every 60–90 days for better security and reliability.
Ingest Labs' Event IQ module helps unify and analyze events across your store and ad channels, providing actionable insights from raw data to real return on ad spend (ROAS).
Final Thoughts
Implementing Shopify CAPI isn’t just a technical upgrade; it’s a strategic move to future-proof your marketing, improve attribution accuracy, and stay compliant with evolving privacy regulations. When done right, it enhances data quality, boosts ad performance, and deepens customer insights across the funnel.
That’s where Ingest Labs makes the difference. With Ingest IQ for robust server-side tracking, Ingest ID for accurate visitor attribution, and Event IQ for actionable intelligence, you get an end-to-end solution built for performance and compliance.
To streamline this process, Ingest Labs makes Shopify CAPI implementation seamless. With our plug-and-play Meta Conversions API Connector, you can integrate your Shopify store with Meta in minutes; no manual coding, no guesswork.
Ready to improve your attribution and conversion performance? Book a demo with Ingest Labs today.
FAQ
1. What is Shopify CAPI?
Shopify CAPI is an integration of Meta's Conversions API within Shopify, enabling server-side data tracking for better ad performance.
2. Is Shopify Capital an MCA?
Yes, Shopify Capital offers funding through Merchant Cash Advances (MCA), providing capital based on store sales performance.
3. Who is Shopify's biggest competitor?
Shopify's biggest competitors include WooCommerce, BigCommerce, and Wix, all offering e-commerce solutions for online businesses.
4. What type of CMS is Shopify?
Shopify is a hosted e-commerce CMS, designed specifically for creating and managing online stores with ease.
5. Is Shopify a good CMS?
Yes, Shopify is a highly-rated CMS, offering user-friendly tools, customization options, and seamless e-commerce functionality for businesses.
6. Is Shopify an ERP or CRM?
Shopify is neither an ERP nor a CRM, but it integrates with both types of software for enhanced business management.


